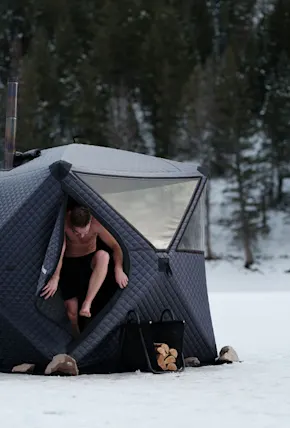
If you've ever dreamed of building your own DIY sauna, you aren't alone. Builder slash videographer Andrew Szeto and his partner Amber are right there with you. And in this article they’re here to show you how to build a sauna in your backyard—or at least, how they did it—including a full tool list, time and cost breakdown, pro tips for designing, and lessons learned to help save you build your own unique DIY sauna.
After building an A-frame micro cabin from scratch in 2019, Szeto continued to learn and build, creating a range of inspired furniture projects in the process. His creative designs have garnered millions of views on YouTube and Instagram, and for good reason. Each is unique yet approachable. Which is the very reason we tapped him to share the secrets of his newest outdoor sauna project, built with an original design inspired by a love for connecting with nature—and the Huberman Lab podcast—with Sauna Times as a frequent resource.
The following interview and build breakdown illustrates how the Wakefield, Quebec-based couple built their own whimsical home sauna—far from the traditional Finnish saunas you may be used to—complete with an Estonian-made stove and finished with upcycled skateboard pieces as the siding. Set in the forested hill behind their home, it's the perfect steamy getaway. And hopefully the perfect source of inspiration for you to get out and build your own. Just remember, eyeballing it works most of the time–but not every time!
If a backyard sauna kit is more your speed, check out our guide to building a sauna kit here.
Give us the sauna build run-down: square footage, capacity, and general concept
The sauna itself is a 7x7 on the inside. It’s actually a pretty great size for being able to navigate around while fitting up to about 6 people pretty comfortably. There’s even room to storing a few spare logs of firewood inside the sauna for easy stove restocking.
What sauna heater did you use and how is it performing so far?
While an electric sauna heater would be the easiest option, our build site is located quite a ways up the hill, so going off-grid with a wood fired sauna heater made the most sense. From there, I balled out on a HUUM Hive Heat 12 Wood-Burning Sauna Stove and absolutely love it. At $2,700 CAD the Huum stove accounted for nearly 40% of the entire project budget. But it’s truly a work of art, a central focus of the sauna, and heats the space to 50 c / 122 F in just two hours so I really can’t complain!
Time & Cost Breakdown
Total Cost, including materials: $5,581 USD
Cost Breakdown: Public Spreadsheet Here
Total Time Commitment: Approximately 200 hours (roughly 10-20 hours a week for two people... was a relatively slow build)
Tools Used:
- Drill
- Hammer
- Chop saw
- Band saw
- Impact driver
- Roofing nails
- Framing nailer
- 18 gauge brad nailer
- Portable air compressor
How to Build a DIY Sauna Step-by-Step
Step 1: Identify the best location for your sauna build and lay the foundation
So for this build, I had a small flat piece of land on the hill behind my house. It was the perfect whimsical spot for it! I ended up laying down some concrete piers below the frost line and built up from there!
Step 2: Build a deck and frame out the sauna
Similar to deck/patio building, I ended up framing up a bunch of pressure treated 2x6’s with simpson strong ties tying everything together. From there, I layed out the walls with 2x4’s and connected them to a 2x6 ridge beam. After tying it all together with plywood and insulating with some rockwool, I had the basic structure of the Sauna together!
Step 3: Add the floor & drain
So the floor on the sauna is an intricate one! I followed the rough floor plans from Sauna Times and created an in-depth video on the process. Effectively, you want to build a sloping concrete floor with a drain that opens to the ground underneath, for any water you may pour on the sauna rocks. To create this effect you install sections of wood, which increase by an 1/8th of an inch every 6 inches or so, adding concrete between and above them. It seemed super daunting going into this, but it turned out alright and drains decently!
Step 4: Roof it
For the roof, because I made this curved roof, one of the only options was shingles. I ended up getting about half the shingles for this build for free off facebook marketplace, and with the help of some roofing videos and climbing gear as my safety harnesses, I got the job done.
Step 5: Add insulation, vapor barrier, and wall paneling
For insulation, we used Rockwool and topped it with Reflectix as the vapor barrier. For Wall paneling, I tongue and grooved my own 4/4 cedar that I purchased from a local mill. I ended up spending about $600 on all the cedar for my build, which was a great deal! I definitely suggest asking a local mill for wood before shelling out for more expensive (and often lower quality) stuff from Lowe's or Home Depot.
Step 6: Add the stove and cut a roof hole for the chimney
I went with a Huum Hive Heat 12 wood Stove. It’s such a beauty to look at and use. Unlike most woodstoves that go into cabins, it was fairly portable by just my girlfriend and I. We were able to bring it into the Sauna pretty easily and from there, I added the piping by using a plumb line off the roof and eyeballing the projected protrusion. From there I cut the necessary holes to install a double barreled insulated pipe leading out of the sauna. Ensuring I had the necessary clearances, it’s performed wonderfully and safely thus far!
Step 7: Finish up the sauna with some special touches!
I don’t get to make too many structures, so when I do, I certainly love to go a little bit wild. As a skateboarder, I always wanted to try and use some noses and tails from skateboards as siding. After adding epoxy and spar varnish to 160 noses and tails, I had a pretty fun and colorful back to my sauna. Furthermore, on the front, I wanted to try out a crazy wavy pattern with some cedar shakes. With the bandsaw, and a lot of running back and forth to the sauna, I ended up with the whimsical structure I set out for. Couldn’t be more stoked for my first sauna build.
5 DIY Sauna Design Pro Tips aka Lessons I Learned
1. Place windows to maximize views. We currently have a nice big window behind the seating area, it’s still quite lovely to look out back, but if it’s a full sauna, we just stare outside through the door. If I were to do it over again, I would reconsider my layout and would have had our bigger window in front of the sauna bench, so that we could enjoy the view a little more.
2. Beware of dead space! Instead of my peaked roof, I should have made a single pitch roof with a lower ceiling height. I really wanted to build something with a curved whimsical roof, so that's what I did, but it honestly doesn’t make a ton of sense for a sauna. In all structures, warm air rises and collects at the top. In an A-frame style roof, warm air collects at the ridge and that’s generally sort of no-man’s land. There can be a delta of about 15 degrees Celsius between where we’re sitting and the ridge. That heat just isn’t being used effectively.
3. Insulate the outside as well as in. In most modern day builds, adding exterior insulation is pretty key and prevents thermal bridging. In this build I ended up using rockwool insulation on the inside only. Mind you it’s still way more insulated than a barrel sauna, but on my next build, I’ll also be creating that external thermal envelope that should help a ton too.
4. The floor is a canvas, too. For the interior floor of my sauna I built a custom sloped concrete floor to allow for natural draining, which has worked great, but it’s sort of boring. I would have loved to have used tiles instead. A bit of colorful or unique tile, in my opinion, would make things more fun and match the whimsicalness of the outside and overall concept.
5. Purchase a real sauna door. Instead of building a wonky arched door myself out of several sheets of baltic birch ply, I probably should have bought one. I had to go through a few iterations to make my handmade door fully air tight and if I were to do it over again, picking up a traditional sauna door made of cedar, with a proper door jam, would be a good idea.
BONUS. Don’t forget your essential oils! My partner Amber loves her essential oils, and brought in some eucalyptus, lavender, and peppermint oils. A drop or two on the water ladle just before going onto the rocks is a game changer!
Published 01-17-2024